I started with a board of walnut and four coat hooks.
I needed to square up my board. In order to do that I grabbed some woodturner's tape and a board that I knew had a machined straight edge.
Woodturner's tape is a double sided sticky tape to hold wood temporarily together.
I taped the staight edged board on top of the walnut board. I used the straight edged board against the rip fence of the table saw.
This gave me a true straight edge on one side of my walnut, so I could flip it around and straighten the other edge. Once that was done I was able to cut the edges down to size and square them up on the miter saw.
Once everything was nice and square I went to route the edges. I should have run it through a planer first, but I didn't. The board was flat enough.
The routed edge turned out great. I then sanded all my rough edges and the surface of my board. Next up I needed to figure out the layout of where all my hooks would be placed. Once that was determined, I wanted to drill 4 holes behind where the hooks would be so I could hide the screws and toggle bolts that would secure my coat rack to the wall.
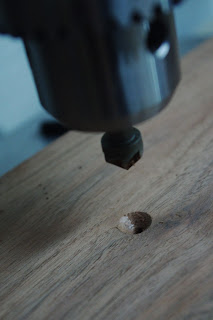
I had to countersink the holes so the screws would lay below the surface of the board and the hooks to lay flush on top of the board when they were attached.
I then drilled my pilot holes for my hooks.
You can't even tell there is a giant hold behind it...PERFECT!
I needed to clean up my board now and prepare it for shellac. I dry wiped down the board and then took a bulldog clip with a rag soaked in mineral spirits to pick up the rest of the sawdust.
Once the mineral spirits dried, I applied a layer of shellac on my board, starting with the backside first. I immediately flipped it over and applied a layer on the front. I wasn't worried about the backside and any markings it might have from my painter's pyramids. The back would be against a wall anyways.
Between each layer of shellac (I put on three) I did a light sanding with 220 grit paper.
Once it was completely dry it was time to hang it. I pulled out my drill and a level.
Once it was attached to the wall I was able to attach the hooks.
The hooks were attached with bright shiny screws. Since I didn't want to hunt down black screws, I went the cheap route.
A paint marker works just fine. Much faster than going out hunting for the correct colored screws. Once the paint on the screws dried, my project was done. SUCCESS!
Maben now doesn't throw his bag anywhere the moment he steps in the house. He is eager to go and put it on a hook. It looks great and functions perfectly. Ahh...how great it was to get some garage time in again.
Sharing this over at:


No comments:
Post a Comment