
Not all test tubes are the same size, so when drilling holes, please keep in mind that what size drill bit I used, may not work for you.

After you acquire your test tubes, you will need two boards. One for the base, one for the arch.
My Base: Curly maple, exact dimensions 14 x 3 3/8 x 11/16"
My Arch: Bass wood, exact dimensions 15 3/16 x 4 x 1/16"
The curly maple was leftover laying around the garage from a project my husband did and I picked up the bass wood at Hobby Lobby, it's mixed in with the balsa wood for building airplanes or doll furniture.

I came up with the length of the bass wood based on trial and error. Not every piece of wood will bend the same way, so I cut the grooves in the maple first.
I set up the table saw at a 45 degree angle and marked in 3/4" from each edge.

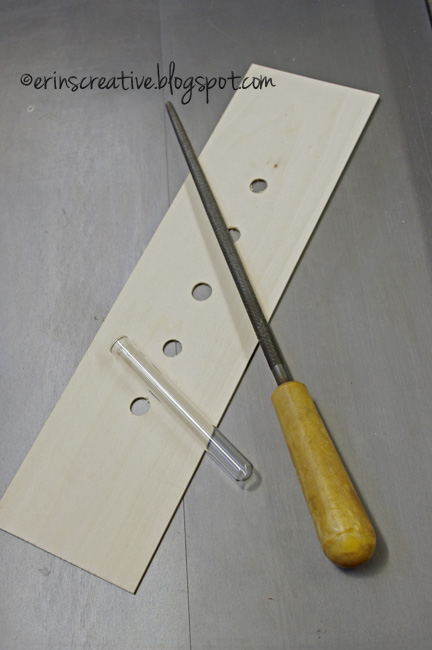
I then ran it through the table saw to cut the grooves. I used a miter sled (shown above) to make sure that I cut my groove straight. I set the saw up to only cut 3/8 deep.

Once the grooves are cut, play with the bass wood to get the right length for your arch. Once you figured out your length, you will need to mark where you want your test tubes to sit. I started by marking the center of the bass wood and I set mine 1 3/4" apart.
I used a 1/2" HSS (high speed steel) drill bit, even though my test tubes were larger than that. I have larger drill bits, but not the right type and I didn't want to risk splitting the board.

After drilling the holes, I traced the mouths of the test tubes and took a round file to rough out the holes to the correct size. The holes on the outside need to be made into a slight oval, because of the bend.
To get the perfect fit, it's all trial and error. Keep setting your arch into your base board and try inserting the test tube until you get the right fit.

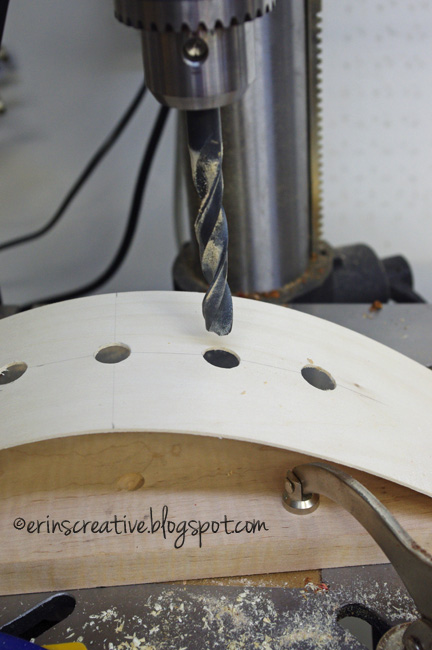
Once you have what you think is the right fit, take your piece (just like the photo above) over to your drill press.
Your holes will be larger than your drill bit, so center your drill bit and set your stop.

The stop is shown above. The holes you are drilling is so that the test tubes have a place to set without slipping around. I set my stop up to stop my drill bit from going any further than 1/8" deep.


Once you are done with the drill, take your base and arch apart. I hand sanded the arch and used the oribtal sander to sand the base. I took it to 220 grit sand paper.

I then stained and dyed my pieces. You can take a look at all the dying fun right here. The staining of arch needed only one coat on each side. The basswood soaked it all in very quickly and evenly.

I did a shellac finish on both the arch and the base once the dye and stain dried.

In order to the apply the shellac, I use a process that my husband showed me. You will need some batting, a lint free rag and a binder clip. Our rag is an old white t-shirt. Place the batting on top of the rag.

Wrap the batting inside the rag, then attach the binder clip to hold it all together.


The binder clip also provides a nice handle to hold onto. I did quick thin layers of the shellac, making sure that they were completely dry between coats. I also buffed it up between coats with some fine steel wool.

Once the shellac was completely dry, I took a new, clean rag and applied a Renaissance wax finish on top. It's not the cheapest stuff, but the quality is amazing and you do NOT need a lot to get the best results. It helps protect pieces from dust, fingerprints and liquids.
Once you have completed your finishing process, put the arch back in the base, insert your test tubes and add some flowers and water! Then marvel at the beautiful piece you made.


Sharing this over at:
So I Married A Craft Blogger: Man Up Link Up II
Sugar Bee Crafts: Take-A-Look Tuesday
Erin, seriously cool art piece and woodworking project. I also love that tip about the shellac applicator! Thanks for sharing.
ReplyDeleteThanks Brittany!
DeleteI love this! beautiful...I want one.
ReplyDeleteI will always remember this blog as a master piece.
ReplyDeletebest-snow-tubes-reviews
My brother got his ICSI treatment from Gem Hospital and IVF Centre In Punjab and the procedure went very well. Their treatments are very affordable. I highly recommend it.
ReplyDeleteyour blog is very good thank you for share and High speed steel is named high speed because of its ability to cut material at a very high speed. It is a specialised form of tool steel. For high quality, High Speed Steel Punjab, contact Bk Steel Company.
ReplyDelete