Showing posts with label organization. Show all posts

November 25, 2013

DIY Hat Rack

When we enter into the Holiday Spiral, I realize that we have too much stuff and not enough organization.  My husband and I never grew up knowing how to organize too much as we moved a lot.  When you move a lot, you get to go through your things and throw out/donate/garage sale anything you don't want to move/forgot you had/or had no recollection of where it came from.  I have lived in over 20 different houses/apartments, so being in the same house for over 6 years, the clutter is starting to take over and I am on a mission to get rid of quite a bit and organize the areas that are driving me crazy.  Our front closet it one of them, which is why I made this.


I can't take credit for this idea.  My grandfather started making these probably before I was even born.  He had quite a few in his house and we had some growing up.  Why I haven't made them before now, I cannot say, but feel like an idiot for not doing it sooner.  My husband and I both have quite a few hats we refuse to part with and most were all hanging out at the top of the hall closet.  They needed to be organized and not take up a lot of space.


You will need a board, the one I used was a 1/2x2x36, wooden clothes pins and wood glue.  That's it.  I had all of these around the house so it made this project FREE!  Who doesn't love a free project that helps organize your house?

You will need to sand your board.  I sanded mine down to 120 grit.

Apply glue to the back of a clothes pin.


Press it onto your board making sure it is centered.


I was able to put 8 clothes pins on a 3 foot board.  My spacing was 1 1/2 inches at the top and bottom, then 1 inch between each clothes pin.

Let the glue dry, then screw this to the wall and you have an easy and very cheap (or free) way to calm the clutter of hats that couldn't have been living in just my closet...right?


Now I just need about 4 or 5 more of these.  Not kidding, we like our hats around here.

January 15, 2013

Organization

I have spent the last three full days cleaning up and organizing the garage.  I got the itch.  Nothing gross I promise.  But, the *Itch* happens to me about 3-4 times per year where I go on a massive cleaning/organization spree.  It will wipe me out in about a week's time, but I need to ride this wave if I want to see some serious progress happen.  Sometimes when the itch hits, it is a little over the whole house, sometimes it is focused on one room.  This time, the garage was the target.

I'm still in the process of cleaning/organizing/sorting/throwing out/etc., so I am going to leave you with a photo of one corner to show you how crazy I have gone in the last few days.


The before is so shameful!  SHAMEFUL!  At least now my husband and I can utilize the lathe and get our stock of pens done. 

September 17, 2011

Coat Rack

Since Maben has started school again, I have found that backpacks, hats and bags are getting dropped EVERYWHERE!  I needed to make a coat rack that they could be hung on.  This is not only for the cleanliness of my house, but for the safety of everyone.  Hubby and I were ready to kill ourselves tripping over everything.


I started with a board of walnut and four coat hooks.

I needed to square up my board.  In order to do that I grabbed some woodturner's tape and a board that I knew had a machined straight edge.


Woodturner's tape is a double sided sticky tape to hold wood temporarily together.


I taped the staight edged board on top of the walnut board.  I used the straight edged board against the rip fence of the table saw.


This gave me a true straight edge on one side of my walnut, so I could flip it around and straighten the other edge.  Once that was done I was able to cut the edges down to size and square them up on the miter saw.


Once everything was nice and square I went to route the edges.  I should have run it through a planer first, but I didn't.  The board was flat enough.


The routed edge turned out great.  I then sanded all my rough edges and the surface of my board.  Next up I needed to figure out the layout of where all my hooks would be placed.  Once that was determined, I wanted to drill 4 holes behind where the hooks would be so I could hide the screws and toggle bolts that would secure my coat rack to the wall.


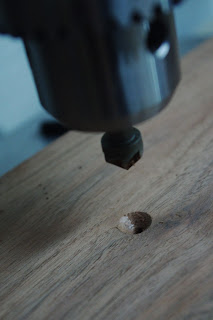
I had to countersink the holes so the screws would lay below the surface of the board and the hooks to lay flush on top of the board when they were attached.


I then drilled my pilot holes for my hooks.


You can't even tell there is a giant hold behind it...PERFECT!

I needed to clean up my board now and prepare it for shellac.  I dry wiped down the board and then took a bulldog clip with a rag soaked in mineral spirits to pick up the rest of the sawdust.


Once the mineral spirits dried, I applied a layer of shellac on my board, starting with the backside first.  I immediately flipped it over and applied a layer on the front.  I wasn't worried about the backside and any markings it might have from my painter's pyramids.  The back would be against a wall anyways.

Between each layer of shellac (I put on three) I did a light sanding with 220 grit paper.


Once it was completely dry it was time to hang it.  I pulled out my drill and a level.


Once it was attached to the wall I was able to attach the hooks.


The hooks were attached with bright shiny screws.  Since I didn't want to hunt down black screws, I went the cheap route.


A paint marker works just fine.  Much faster than going out hunting for the correct colored screws.  Once the paint on the screws dried, my project was done.  SUCCESS!


Maben now doesn't throw his bag anywhere the moment he steps in the house.  He is eager to go and put it on a hook.  It looks great and functions perfectly.  Ahh...how great it was to get some garage time in again. 

Sharing this over at:

February 17, 2011

Photo Label Tutorial

Does it ever drive you nuts when your kids just toss all their toys into a giant pile and that is their idea of picking up?  Well, it drives me insane!  I am a person who likes to sort, things need to be stored with like things.  It makes things easier to find.  I am not a neat freak, my house is quite disorganized, but there are certain areas of the house that I have tackled and been trying to keep up with the organization.  The toy area in our living room is one of them.  We don't have a dedicated play room, if we did, I am sure I would just shut the door and not be bothered with it.  Since that isn't the case, this is the solution I have come up with.


I bought some mobile drawers and have used that to keep the clutter of toys at bay.  For the most part it works.  I can thank my 3 year old for helping keep everything organized, because I think I passed down the "sorting/matching" gene to him.  My 16 month old did not get that gene.  He is utter chaos and I am hoping that the photo toy labels will help him when it comes to picking up.


Now, I will show you just how easy it is to create these labels. I was so happy with how they turned out, I think I just might create a bunch of these labels for my craft room.

What you need:
Camera
White Poster Board
Printer
Shipping Labels
Photo Editing Software
Microsoft Word
Toys

I first set up my photo area.  I taped my poster board to a chair and put it near a window.


So professional right?  But the outcome was exactly what I wanted.


Once I had taken photos of a handful of items from each drawer, I uploaded all my photos to Adobe Photoshop Elements 9 and cropped to the same size as my shipping labels, touched up my photos and added the text.


I then opened up Microsoft Word.  I have version 2007.  In that version, you need to select "Mailings," then "Labels."  It will open up a window and you will select "Options..." and then the make and number of your labels.  Mine were made by Avery and the number was 6878.  You then select, "New Document" and it has the format all set up for you.  All you have to do now is insert your photos.


I printed out my completed labels and they looked great!


All I had to do now was stick them to the drawer fronts and I was done!  My 3 year old watched me do this part and was fascinated and super excited about them.  Now all I can do is hope this helps the little one learn that all his toys have a place to be put away.  He is young still, so I am optimistic that it will catch on.


I am so happy with how it looks.  All I have been doing now is thinking of all the things I can label.

January 26, 2011

All Those Great Ideas

If you are like me, you often see great ideas of things you want to make but just may not have the time, money or items to make it.  You then throw it on that mental list that likes to randomly erase things and forget about it.  Well, that's usually what happens to me.  I figured out a solution to that problem.  I have created an idea book.

I managed to find, while cleaning my house, over 400 page protectors and lots of empty binders.  I took one of the binders and lots of page protectors and have been sliding in all those great ideas, from magazines, online, etc.  It is definitely helping me clear the clutter, since I had been holding onto a few magazines that had some great ideas in them.  My magazine pile is getting much smaller now.  I also now have a project list that keeps getting longer.


I even found lots of dividers too.  I haven't filled the idea book enough yet to divide them into categories, but they are there for when I need them. 


On the right side, it is the front of the article that I wanted to recreate.  Behind them is any other pages or ideas that are similar.  The very front page shown in the top photo is new ideas on how to recreate your family tree, from Martha Stewart Living.  The bottom photo, on the left is the rest of the article on recreating the family tree and on the right is another idea that I liked.  Fairly straightforward and simple, but I have a feeling it is going to be super useful.  Now I need to print out all those PDF tutorials that I have saved...just in case something happens to my computer.

You Might Also Like

Related Posts Plugin for WordPress, Blogger...