Showing posts with label outdoor decor. Show all posts

July 30, 2013

An Arbor and A Bench

Our backyard has been a work in progress since we moved in.  When we moved in, I was glad we "technically" didn't have kids, even though I was pregnant.  It wasn't fit for kids to play in or people to hang out there.  It was atrocious!  Every year, my husband and I tackle more and more of it to turn it into the backyard oasis we want it to be.  Last year you might remember we laid a LOT of stone for a patio and walkway.  This year we hatched a plan to build a bench and arbor behind the patio to provide more seating.


My husband and I sat down at the dining room table and talked about and drew up plans for the arbor.  He even provided me with directions from a woodworking magazine on how to do the arbor.  I didn't really follow those.  I'm not good at following directions.  My hubby would agree. 

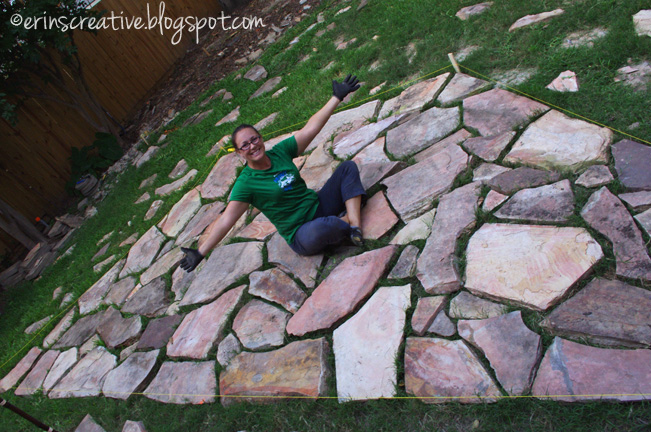
I started with laying the stones across the bottom to build the base.  By the way, aren't those stones just lovely?  What makes them even lovelier is that they only cost the sweat and muscle of my husband!  He went to go buy them at Lowe's and they had discontinued them!!!  So, the smart man my husband is, he asked what they were going to do with the display ones and they told him that they were going to throw them out!  He asked if he could buy those and since they weren't in the inventory anymore he couldn't...so they gave them to him, if he was willing to work for it.  SCORE!!!  If I can tell you anything about us, we aren't afraid of work and getting sweaty.  So, by far, this was the cheapest trip to Lowe's we have ever had. 

After the first few layers of stone was laid, I built the bench, since I had an exact measurement of the length of it.


I used cut copper pipe as spacers in the bench.  Copper pipe was also used at the top of the arbor.  We chose copper because of how beautiful it is and how it will change color with age.


I plan on having a vine crawl up and over, so I planted a star jasmine.  It grows fast, smells amazing and produces lots of clusters of white flowers.  It's not currently flowering, but when it does, it will smell heavenly back there.


Even though I did most of the construction for this project, I feel like it is truly a joint project as my husband and I planned it out together and he acquired all the necessary items for the build.  He also broke a stubborn stone in half for me. 


Now the kids have a place to sit when we invite friends over to sit around the fire with us.  Mmmm, now I want to eat some smores!

I also feel like we are nearing the finish line for our backyard makeover.  It's been a 5 year marathon so far.

March 25, 2013

We're At It Again

Tis' the season for outdoor improvements.  My husband and I both think that outdoor space needs to be functional.  Since we moved into this house almost 6 years ago, we have been slowly transforming it to be exactly what we want it to be.  Last year brought the biggest changes with our slate patio and walkway. 


Can you believe that we took this nasty mosquito trap and turned it into the patio and walkway without having to buy a single piece of slate? 


After all that hardscaping, we still had slate leftover, and when unearthing all the stone, we also had concrete steppers as well.  We put them to use and took care of a spot in our yard that with every rain storm would do under water and become a lovely mud pit for the dogs.


Can you believe we still have slate leftover?  It's true and I have no idea how we are going to use it up.  I'm sure I will come up with something. 

Now, our next project involves this lovely pile of stone that my husband procured with some hard work and sweat from Lowe's.  They discontinued these, when my husband asked if they had any in stock and was told they no longer carry them, he asked about the ones being used on a display.  Well, they were tearing it down and let my husband help with that process.  YAY!  Free stone! 


Now, I am hoping in the next few weeks our next project will be ready for a reveal.

Anyone else DIYing their landscape?  Like up in the comments if you are, I love to get inspired, especially before it gets to hot to work in South Texas heat.

December 31, 2012

My favorites of 2012

I did a whole lot of creating in 2012.  I have compiled my top 5 6 (I couldn't narrow it down to 5) to share with you, in case you missed any of them.

In no particular order:


An awesome project creation that I made for my son's preschool auction.  I bought it back, I was so happy and proud of it that I just couldn't let it go.  It was also the perfect bookshelf to hold all the odd shaped kids books we have.


This has been my only craft to really go viral.  It's been pinned thousands of times, ripped off and posted in more languages than I can recognize and also received the most scrutiny (apparently I am making squirrels obese with it).  Either way, I love it, I get to see some of my local wildlife, squirrels realized quickly that their success rate in getting into the feeder was not high enough and I haven't had a squirrel in there in about 5 months.  I've made a few as gifts for others that love watching/feeding the birds as much as I do.  It's funny to think that my 15 minutes of crafting fame is  a bird feeder made from cheap melamine plates I bought on clearance at Target.


I have been doing lots of free online tutorials to better myself in Photoshop.  Even after 14 years experience using the program, there is still a lot more to learn about it.


This was definitely the year to improve our back yard.  This stone patio was the major undertaking and I am still very pleased with it.  Now if we could only figure out a really good way to get rid of mosquitoes and we would be all set.


This was created for SYTYC.  It was the first piece I created that felt like fine art to me.  I love how it turned out and I was able to play with a few new techniques (like dying wood). 


 This was my finale piece for the SYTYC competition.  It is still hanging in my entry way and I love it just as much today as when I first completed it.  It holds a serious sense of pride for me.  I cannot believe that I built it in 4 days!  I also am elated that it was the piece that got me first place in the competition.


June 14, 2012

DIY Bird Feeder

I am so excited to be competing in So You Think You're Crafty and even more excited and honored that my audition craft took first place.  Now, I am going to show you how to make your own.


There isn't a whole lot of supplies that you need for this. 


  • Drill and standard drill bit (if you are choosing to use a melamine bowl and plate like I did) 
If you want to use ceramic or porcelain bowls and plates, buy a drill bit designed to drill them
  • Bowl and Plate (mine came from Target at less than $2 each)
  • Large carriage bolt, I used 10"x 5/8"
I would have used an eye bolt if I found one of the size I needed, but I didn't, so I couldn't
  • Three washers that will fit your bolt
  • Three nuts that will fit your bolt
  • Glue (I like to use CA glue)
  • If you use a carriage bolt like myself, you will also need some nylon cord
The trickiest part of making the bird feeder is drilling your holes.  Plastic has a tendancy to crack, chip and break.  I will show you how to avoid that.  Take a block of scrap wood and place it directly under where you are drilling. 


Even with the block of wood, because the bowl and plate isn't perfectly flat, you might have a bit of chipping, but that shouldn't be a problem.  You are just trying to avoid cracking the plate or having a large blow out.


See, even mine chipped.  Not a big deal, it won't be seen.  Once you drill the holes in the center of your bowl and plate, it's time to assemble your piece.

Place a washer on your bolt and then bring your bolt up through the bottom part of your bowl.


It will be very wobbly, so you will need to sandwich the washers around the bowl with glue.  The order goes, washer, glue, bowl, glue, washer.

Then you will take a nut and thread it a few inches down.  Your plate will sit directly on top of this nut.


Place your plate on the nut, then thread another nut so that the plate sits between the two.  Hand tighten them so your plate doesn't move, but not so hard that you crack the plate.

Then place another washer and another nut on your bolt.  This step is only necessary if you used a carriage bolt like I did.  If you found a large eye bolt, your assembly will be in reverse.


I will show you the the reason for the stacking of the nuts and washers on the top.  Did you ever do make lanyard keychains/bracelets out of the plastic cord as a kid?  I hope so, because that is how you are going to make your loop.  So, cut yourself two pieces of nylon cord about 2 feet long each.

First, tie a simple overhand knot (the first knot you make when tying a shoe) with each piece of cord.  Make sure the knot is around the middle of the cord.


Then you start doing a lanyard knot (technically called a crown sinnet knot) over the top of the washer, but make sure your overhand knot stays tight while doing so.  If you aren't comfortable with your overhand knot, glue it before proceeding to your crown sinnet knot. 


I found a great animation on how to do the crown sinnet knot...so if you don't understand how to do it, please visit Animated Knots by Grog to check it out.


Once you have created a few inches of the crown sinnet knot, take two strands of cord and make some loops like so.  You will then take your two remaining strands of cord and tie an overhand knot around the base of your loops.


Pull it very tight.  You don't want it to come loose.  Then, cut the excess cord off.  Cut close to the base of your knot


You will need to burn the ends of your nylon cord.  This will cause it to melt and expand a little.  This will make sure your cord doesn't unravel and your knots won't come out.  The above photo shows burned cord ends on the right, and unburned ones on the left. 

All you have left to do is go fill your bowl with bird seed, hang it outside and wait to see what feathery friends come to visit.  It took less than a day for my first feathery friend to discover the new bird feeder.  Once that happened, I've had regular visitors ever since!


I hope you create your own bird feeder.  I would love to see pics of any you make!  If you have any questions, please feel free to ask.

Sharing this over at:
Momnivore's Dilemma - Creative Juice  
Sew Many Ways - Sew Darn Crafty 
Not Just a Housewife - Show Me What Ya Got

May 30, 2012

We Built A Patio

My husband and I took advantage of the long weekend and finally tackled a large project that we have been meaning to get to for a long time.  We FINALLY built the stone patio that we wanted.  Ta Dah!


Now for you to understand the full feeling of relief, I have to give you a little history.  The spot in which my husband and I are sitting use to be a fish pond.  Probably a magnificent one in it's hay day.  The only photo of the pond I could find was the one from when we bought the house.


Now, I have to say, this photo was taken probably long before the house was ever on the market.  When we moved in, the pond liner was ripped, so it would only fill half way (it was about 3 1/2 feet deep), the electricity to pump and filter was not functioning, so it was a giant mosquito trap that no matter how much mosquito killer stuff I put into it, it didn't matter.  So, since I had to regrade the flower beds in the front yard, I filled it in with dirt.


So this is pretty much what it looked like for the past few years.  We decided to take all the stone that was used for the fish pond and make it a patio.  What we didn't expect, HOW MUCH STONE WAS THERE!!!  In some spots, we dug up three layers of stone.  We have enough stone to do a full walkway from our covered patio near the back door out to the stone patio and then some.

We cleared the area, staked it out and invited over our friend Lex to help.  Meet the help!  Hubby and Lex.


Friday afternoon/night, Matt marked out in the lawn the shape of the patio so I could use my mad crazy awesome tetris skills to layout the stones, so we would have some idea of how to piece it all together when it came time.


I moved most of those stones by myself.  I can't believe I could lift half of those!


Saturday, Matt and I spent the morning running around and doing our typical weekend chores, like grocery shopping and picked up some last minute supplies.  Then in the afternoon, Lex showed up and we all started working.  Most of the work was done Sunday.


I labeled all the stones with chalk.  I numbered them and made orientation lines, so when moving the stones from our mock patio to the real patio, we would know how they went.  It worked fairly well.

While I did that, the boys leveled the patio area, rented a plate compactor to level out the soil.  Added decomposed granite and plate compacted it again.  Then it was my show.  We added our layer of sand and I played tetris with all our stones.  I had to make a few adjustments, but all in all, not bad!

By mid-morning on Monday, all the stones were set in sand.  We had accomplished all the hard tasks.  Now we just needed mix up a sand and soil mixture to sweep between the stones.


Normally you would just use sand, but we were planning on putting stepable herbs between some of the stones.  They need some nutrients.


For the stepables, we picked up lemon thyme, lavender thyme and corsican mint.  They all smell heavenly!  The added bonus, the mint is suppose to help repel mosquitoes! 

Before I planted the herbs, I swept my mixture into all the cracks between the stones and watered it in.  Then I planted the herbs, added more mixture to sweep in and watered it down again.


I planted the mint under where the firepit table and chairs would be because it is the lowest growing.  Both thymes were planted on the edge, because it can grow up to around 6-8 inches.  The guy from the garden center told me that if it got too high we could just mow it.  Awesome!


And now it was done!  We kicked back, enjoyed a beer and relaxed at a job well done, that was finally done!


We have some plans for a few more decorative touches around the new patio.  One of the first on the list, to fix that walkway and get it to match! 

(p.s. if you look at the fence in the last pic under the Texas flag, that is most of the stone we have left over, it's a lot!)

Sharing this over at:
One Project Closer - Before and After Series

March 5, 2012

Fence Picket Flag: Texas Edition

One of my favorite projects for decor last year was my Fence Picket American Flag.  Well, I decided to do another, this time a Texas Flag.


Now, not a Native Texan, but both of my children are.  I also don't mind being patriotic and Texas has treated us well.  I could deal without the 100+ degree weather in the summer, but overall, Texas is pretty great and I am okay with celebrating that.


Both of my flags were done to the correct proportions.  This is why the Texas flag looks smaller than the American flag.  Other than cutting off a portion of the fence pickets, the process was the exact same in the construction.


It looks pretty great hanging on our fence.  Don't mind the large pile of stone, we are turning that into a patio...hopefully sometime this summer.

You Might Also Like

Related Posts Plugin for WordPress, Blogger...