
Oh, yeah, the reason why there is pink dust and glitter all over my garage, I went out and turned two pens tonight. They were acrylic pens. I am going to walk you through what exactly happens when I turn a pen.
It starts with a pen blank, like so. Well, with the style of pen that I did, it starts with half a pen blank.

You then drill out the center of your pen blank.

After you drill out the center, you get a brass tube, rough it up with sandpaper and glue it inside the blank.
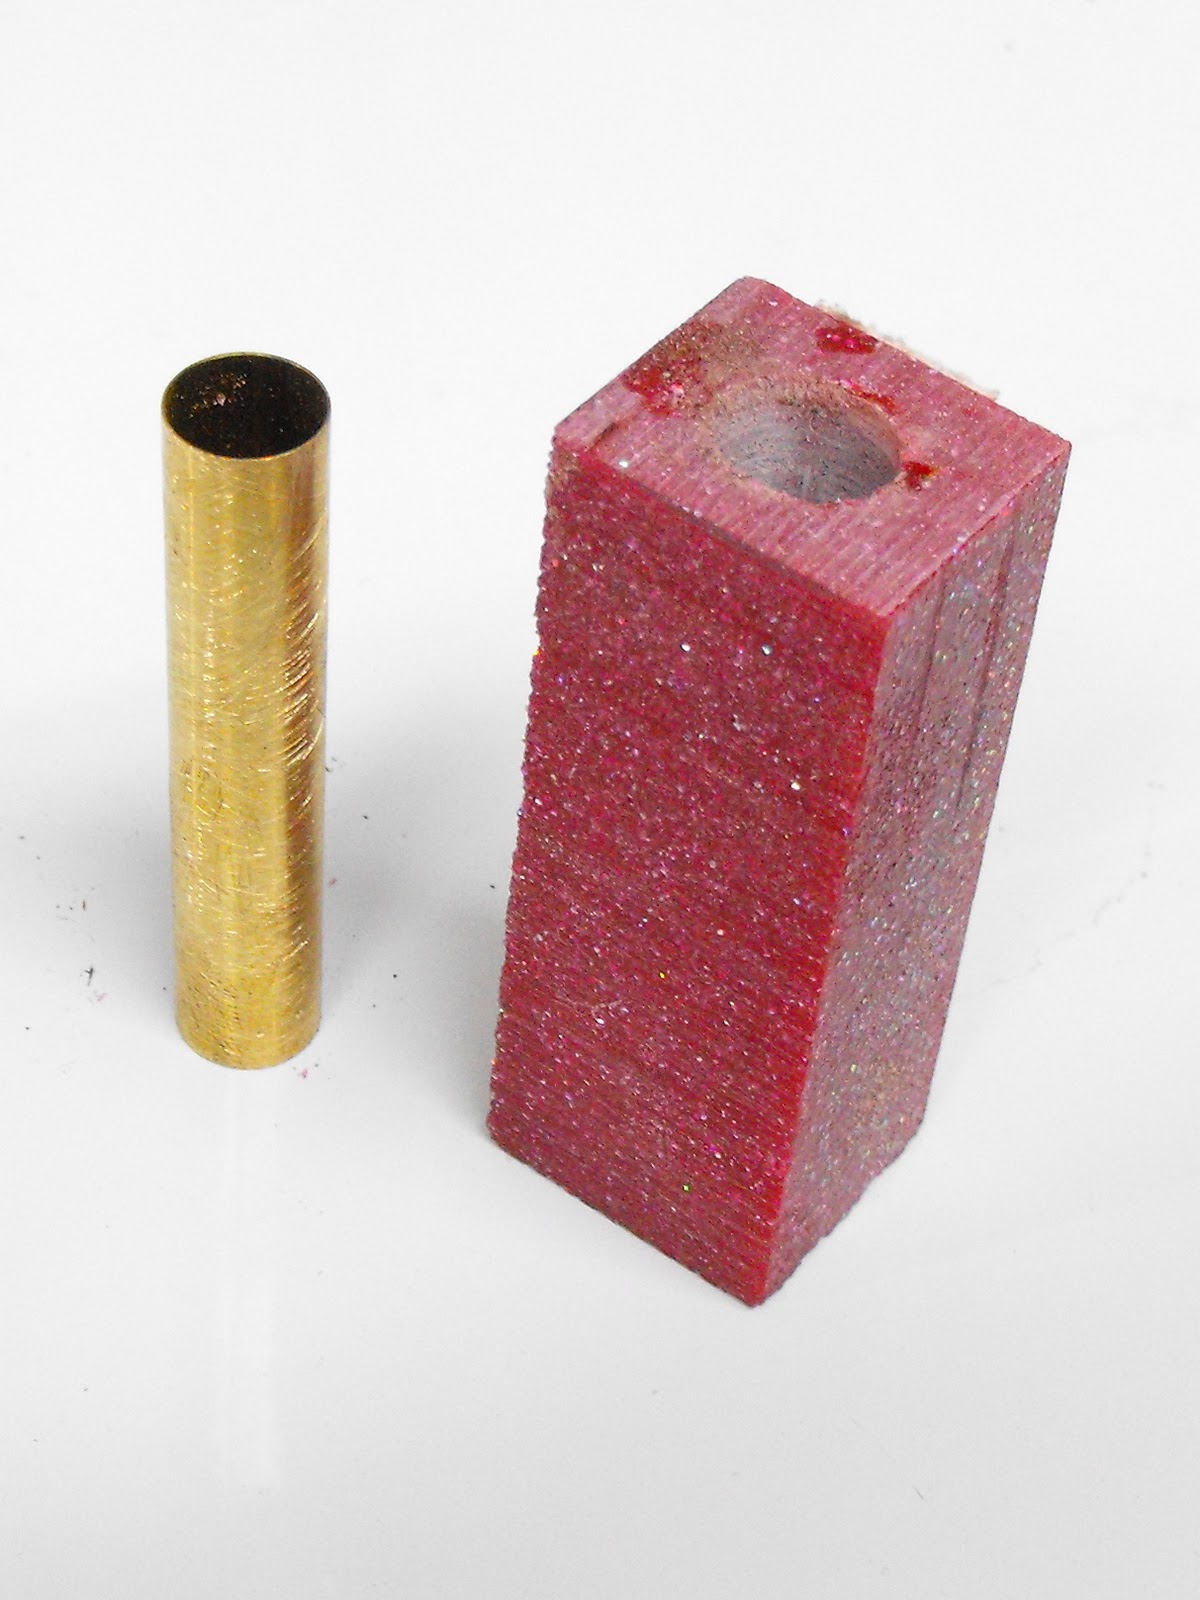
You then use a barrel trimmer to drill out the excess blank and get down to the tube. This is why you can see the shiny ring.

Load it onto the lathe with the bushings (which show you how far you can take the blank down to) so I can piece together with the pen kit accordingly. A full pen blank can make two of the pens that I did, so I decided to turn both at the same time.

Safety first! When turning acrylics, I skip the safety glasses and opt for the face shield. Sometimes when little chunks of plastic come flying at you, it can hurt. I am holding in my hand my turning tool from Easy Wood Tools and LOVE IT! This turning tool doesn't have to be sharpened, it has a carbide tip that you can rotate when one side gets dulled and then eventually replaced. This was actually a gift from my husband. He's so lucky that I prefer my shiny gifts in the form of power tools as opposed to jewelry. I am sure it makes shopping for me much easier.

Anyways, back to the pen blank and the crap that can sometimes happen...like this! This is called a blow out and is sometimes fixable. If it breaks off into a solid piece, you can glue it back on and hope that you can hide the cracks.

And since I had two blow outs on the same blank, I decided to give up my turning tool and aggressively sand down the rest of the blank. So this is me sporting my mask.

After the rough sanding, wet sanding and a little wax, this is what the blanks look like. All nice and shiny and sparkly...my favorite type of distraction.

Once they have been put together with the pen kits...they are nice, shiny, new, sparkly pens! I am not sure which one I like better, the silver or the gold. Either way, I think they both turned out great and was able to hide/fix the blow outs very easily. Also, they are very festive red which is perfect since my goal was to use one in a gift swap next week.

By the way, the pen kit used here is a Wall Street II which was probably purchased at my local Woodcraft. I love that place and all the nice guys that work there.
I hope you enjoy seeing the process of making a pen. It is a big stress reliever for me and I love to do it. I am so happy that my husband and I decided to take the plunge and learn to do this. Thanks honey for a wonderful date that gave us both a hobby!!!
No comments:
Post a Comment