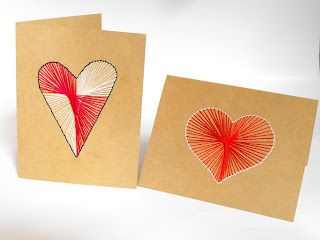
Didn't these just turn out AH-MAY-ZING!?!?! Keep scrolling down to find your step by step instructions on how to create your own.
What you need for this tutorial:
Plain card
Heart template
Pencil
Scissors
Needle
Cross stitch thread (at least two colors)
First you will need to lightly draw a heart on your card. This will be used as your guide. I split my cross stitch thread so instead of having 6 pieces of thread, I use 3. Don't worry about cutting it super duper long, I will show you how to add more thread in case you run out before completing the heart.
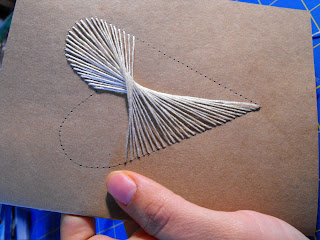
The first technique I am showing is a freehand technique. I started at the bottom of the heart and pierced the paper with my threaded needle. Leave a 3 inch "tail." This is important later on. Keep a finger on it so you don't accidentally pull it through on the first few passes you make.
Make sure to work in opposite directions. On my card, the bottom of the heart I am working towards the left and the top of the heart I am working towards the right.
I am not reproducing the same look on the back. So when I start at the bottom, I go to the top. I then punch through the top and come back to the bottom. The inside of the card will start to look like this.
Keep going until you run out of thread. You more than likely will if you do anything larger than a 1 inch heart. I just simply tie off the old thread with the new one as shown.
Continue until your heart is complete. Then tie off the original "tail," with the end of the thread for the heart and your second color of thread.
I then stitched the edge of the heart through the holes that were already created from doing the heart. From the back side, go forward one, push through, come back one. From the backside again, it will now continue go forward two holes, push through and come back one hold. Continue until the outside of the heart is complete.
There are two different things you can do with the inside of the card. I will show you both. With this one, I left all the tie offs messy. I cut out a piece of scrapbook paper to the size I wanted and used spray adhesive to glue it to the inside of the card. The really neat part of that, it leaves you an embossed heart on the inside.
Before the paper was applied, it looked like this.
The completed first card. Isn't it gorgeous?
Now for the second card. Lightly draw your heart on your card. Then on this one, I pierced the paper before threading it. The trick to this, you HAVE to count all the holes and find your beginning and middle, otherwise you will end up with all the holes on one side filled and a few extras on the other side.
You then start your thread the same way as you did with the first one. On the second card I decided to use two different colored threads for the heart. I switched up the colors when I had half of the heart complete, like pictured below.
Once the heart was complete, I finished the outside edge of the heart the same way as the first card. The biggest difference was the back. I tucked all the extra cut offs under the thread used for the outline.
Here is the completed second card. I can't decide which one is my favorite. They both turned out so much better than I could have even pictured in my head. Isn't it fantastic when that happens?
Now these two beauties are all set for a Valentine's message to be put inside. Now, who to send these to? Hmm....
I just added this post over at Vintage Wanna Bee. Love that blog!


I love this! I bought some earrings like this at the fair last year, thanks for sharing.
ReplyDelete